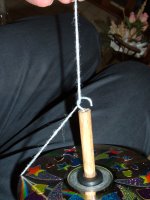
 I spun these “S” and then plied “Z” since I want to use this for knitting. I only did a 2-ply, but did consider a 3-ply; I like it better for a knitting yarn. To spin “S”, I roll the shaft with a very fast swipe along the side of my thigh upwards. I am doing this on the right side, but if you want to do it on the left side, you will have to roll it downward. I can get quite a good speed on it that way, and then I just let it twirl! When it slows down, I might add another spin, or stop it and wind on.
There are actually 2 CDs on the whorl – and the top is decorated  with some bright stickers! And why shouldn’t it look pretty while you use a simple tool?! This spindle has a simple cup hook at the top. I like to come up from behind the hook and just through it. This is enough to hold it in place; it won’t slide anywhere!
This shows a finished cop which I just  slipped off the spindle, and another one on the way to becoming spun! I usually use a slip of paper rolled around the spindle shaft as a quill, which holds the cop solidly, and I can put it on a lazy kate when plying. These worked well when plying without it, except when I reached the last few yards, but I managed without getting it all tangled!
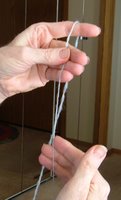
There is a simple movement to allow the twist into the unspun roving. I will try to describe this, but it is easier to show than to say! I need to explain something at this point: you need to know that twist will move all along any length it can between two unobstructed points. In the case of this spindle, most of it will be from the hook of the spindle to your first hand. If you open your hand, the twist will run along the opened up free areas, until it meets another obstacle. You control this length. You need to know the length of the fibre you are working with; this determines how far apart you will hold your hands. Too far apart and it will come apart for you and you will know the meaning of "drop spindle".
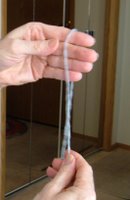
I will describe the hands as top or bottom hand. You may use right or left as your dominant hand; the movements are the same. First, you need to have a good amount of twist in the lower part, from the spindle top to the lower hand. You will have a few inches from your last spi n to act as leader. The top hand will pinch off a section about 4-6 inches above your bottom hand. The bottom hand releases the twist into the top section. This is enough to hold the fibres together. You continue to let enough twist build up in this area, and then pinch off with the lower hand.
The top hand will move up a couple inches and pinch off a new section. The lower hand releases the twist and allows it to run into the top. Again, the bottom is pinched and the top moves up. And you continue this dance until you have an arm’s length, or when the spindle reaches the floor. The spindle has been twirling away while you are doing this, and eventually slows down, usually about the time you have reached your arm’s limit. Stop the spindle, and still holding the yarn under tension (arms far apart), wind on the newly formed yarn to the spindle shaft. Wind around the hook, and start over by rolling it along the thigh once again!
It's just that easy!
2 comments:
Hooray for you and your helpful, informative, lavishly illustrated blog! Three cheers!
back in the 90s i spent my summers working at a living history program in salem, ma. it was supposed to recreate salem as it was in 1630 (a la plimoth plantation, but not as nice).
anyway, i learned how to spin on the saxony wheel, which i loved. i also learned to use a drop spindle (i eventually made my own) and the great wheel too. i was the only one who could use the great wheel, and now that i think of it, most of the other staff members weren't all that good on the saxony wheel either. i was by far their best spinner, and i SOOOOO miss it.
i've been thinking of picking up a saxony wheel because they're pretty common in antique shops in this area. i'm sure if i found one, i'd have to restore it, but i'd love to start spinning again.
Post a Comment